Happy Thanksgiving!
Pies can be very time-consuming, and making one from scratch takes a lot of work! Pies are also a lot about timing, as many steps require resting or simmering. But, Apple Pie is one of my favorite desserts for Thanksgiving and having a baking project helps pass time over the break from school. Be prepared for lots of cutting, peeling, mixing, stirring, and most of all, eating:D
Here’s what you’ll need:
For the Dough:
- 3 cups all-purpose flour
- 2 tablespoons sugar
- 1 teaspoon salt
- 7 tablespoons shortening
- 10 tablespoons unsalted butter(if you only have salted, omit the salt above)
- Ice water
For the Pie:
- 1/2 cup unsalted butter
- 3 tablespoons all-purpose flour
- 1/4/ cup water
- 1/2 cup white sugar
- 1/2 cup packed brown sugar
- 7 Granny Smith apples
- 1/8 tsp ground cinnamon
- 1/8-1/4 tsp vanilla extract
- Pinch of nutmeg
___________________________________
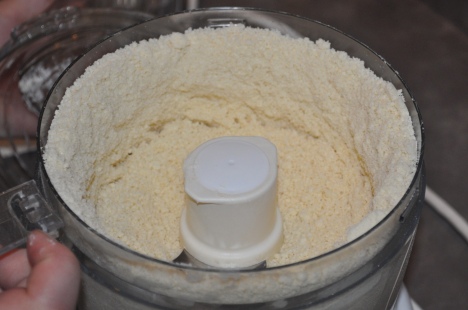
1. First, you’ll want to make the dough. If you have a food processor, it will become handy, but make sure yours is big enough to hold the ingredients.Start by measuring out the flour, sugar, and salt. Place them in a large bowl, or in the processor if you are using one. Process or just mix them together until they are blended. Next, cut up the shortening into small chunks and place it all around in the flour mixture. If you are using the processor, process it until it looks like coarse cornmeal. If you are doing it by hand, use 2 butter knives, a fork, or a pastry cutter to cut the butter in until it resembles cornmeal.
The mixture should look something like this(not my photo):
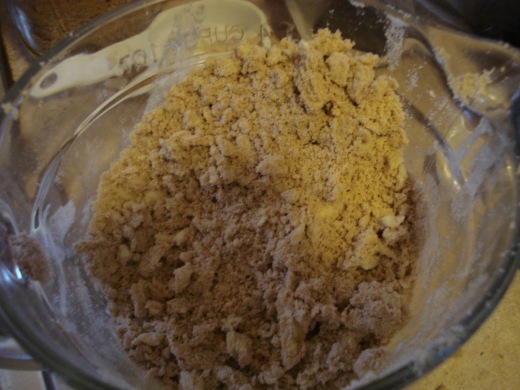
Next, add the butter in the same fashion. Cut it into smaller pieces and process or cut it. This time the dough should look like coarse crumbs. LIke this:
2. Now, fill a bowl with a few ice cubes and some cold water and wait a few seconds for it to get very cold. Then, add about 5 tablespoons of the ice water into the mixture and use a rubber spatula to fold it in. Add another 5 tablespoons and fold that in. The dough should look flaky, almost like it shouldn’t form a ball but it should be moist. If needed, add a bit more water 1 tablespoon at a time.
3. Sprinkle flour over a clean counter or pastry board and spread it out. Then, transfer the dough from the bowl to your prepared surface and use your hands to gently form it into a cohesive ball. Then, separate the dough into 2 even pieces and flatten them each into a 4-inch disk. Wrap in plastic wrap and place in the fridge to chill.
4. Now it’s time to work on the apples! I used the Williams-Sonoma Apple Peeler, Corer, and Slicer. It’s an amazing tool if you make pies more than once a year or so. If you don’t have one, prepare yourself for the most tedious part of this recipe. The apples should be peeled, cored, and sliced lengthwise pretty thin. Place the slices in a separate bowl.
5. In a saucepan, melt the 1/2 cup of butter over medium heat. Stir in the flour to form a paste. Add the water, brown sugar, and white sugar and turn the heat up a little to bring it to boil. It should be bubbling a little but not burning or anything. Then, turn the heat and let it simmer. Add the cinnamon, nutmeg, and vanilla.
6. Take the crusts out of the fridge. Make sure there is still four on the surface and unwrap one of them. Using a rolling pin, roll out the dough until it is large enough to cover the pie plate you’re using, and then some. Don’t roll it too thin. You may want to put a bit of flour in the rolling pin before you start. Then(this is the tricky part) roll the dough onto the rolling pin, wrapping it around the pin, but not so tight as it molds to itself. Then, center the rolling pin with the dough over the pie plate and carefully unwrap the dough over onto the plate. Use your fingers to press the dough into the pie plate.
7. Pour the apples into the pie plate. Mound them slightly but don’t overfill it. Try and situate them so they aren’t sticking up and so they are filling all of the plate. Then, preheat your oven to 425 F.
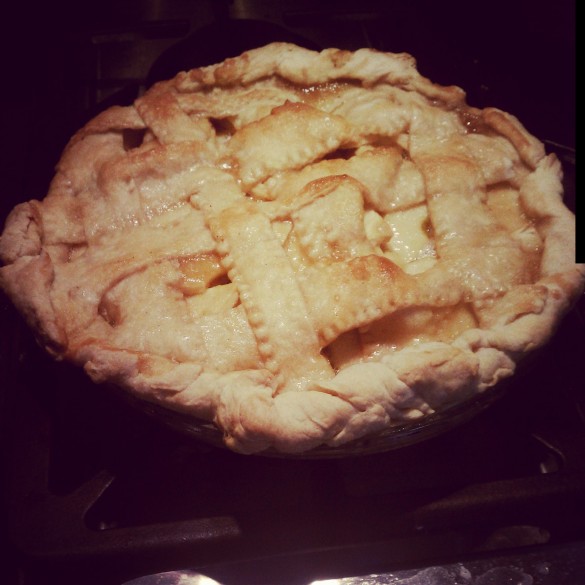
8. Unwrap the other dough disk and roll it out to about the same size as the other one. Using a pizza cutter or a butter knife(I used a ravioli cutter because I had one and it looked cool), cut the dough into 10 strips. You may want to plan out the spacing first. Then form the lattice on top of the pie.
Step 1: Place the 2 longest strips in a cross across the middle of the pie.
Step 2: PLace the 4 smallest strips as shown.
Step 3: Place the remaining 4 strips in between the others, as shown
Then, roll the edges of the dough up so they don’t hang over. How you decorate it is up to you, you may want to crimp the edge with your fingers or press a fork’s tines to create the design.
9. Remove the butter/sugar mixture from heat and carefully pour it over the lattice, pouring slowly so it doesn’t run over the side. the lattice should be fully covered but make sure to pour some into the spaces between to cover the apples too.
10. Time to go in the oven! Bake at 425 for 15 minutes, then turn the oven down to 350 and bake for 35-50 minutes or until the apples are soft and the crust is golden brown.
Enjoy!!


